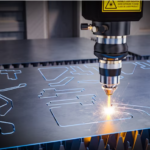
The famous and easy method to cut and engrave materials is through a laser cutter.
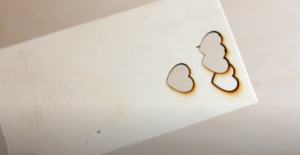
However, the specific annoying issue with using a laser cutter while cutting the materials is that there be stains of the burn and dirty marks around the border of the cut.
Fortunately, there is some resolution to prevent burning when laser cutting or removing the stain. So let’s read on to see how to deal with it.
We’ll be going over shortly in detail:
Table of Contents
What is Laser Cutting?
Laser cutting is a non-contact method that uses a laser to cut materials, high-quality outcomes, spatial accurate cuts. The laser cutting process operates by managing the laser beam through neb to the workpiece. A blend of heat and pressure creates the cutting action. During laser cutting materials vaporize, melt, burn leaves an edge with a high-quality surface finish.
Okay, now you have an idea about what is laser cutting. You also know its burns and get unknown marks when you cut materials from a laser cutting device so knowing the reason behind burning helps you to protect your time, money, and materials.
Reasons of burning while laser cutting
Burning is one of the major laser cutting problems while cutting. You need to understand that laser beams never touched the surfaces of plastics, woods, or paper. Similarly, on the inside of a chimney, soot from the burning of organic items remains in the surrounding area.
Just like that, there’s no need to be worried about the laser damaging wood or other materials. It’s just a case of understanding the reasons and preventing to avoid stinging your laser cut materials.
Firstly explore the reason for burning while laser cutting!
- Usually, burn marks in the wood or other materials are caused by the fumes and debris that are excreted while cutting process.
- Remember that burn marks don’t appear on every item that you laser cut. Laser cutter or engravers will either melt, vaporize, incinerate some specific things based on the density and composition.
- Sometimes the extremely high temperature that the laser cutter sets off at, the fumes that are generated during the cutting process burn the nearest surface of the laser beam cuts the materials.
- Mostly you can see significant burn on the primarily combustible materials.
- Burn marks might appear on the opposite side of the materials where the laser beam has come into contact with the snot, so you need to prevent as much connection between your cutting materials and slit as possible.
Note: The key concept behind the laser cutters and engravers is a CO2 laser accurately burning through your materials, like wood.
By the above points, you should expect at least some burning or browning on the edge of the engraving. While a certain amount of scorch can become problematic and can make a material unappealing. There are many methods which are used to prevent this issue, which we will get to in a moment.
Methods to prevent burn marks on materials during laser cutting
So now we know the reason why laser cutter burn marks happen. Some methods prevent burning or scorching or at least reduce the marks that are caused by burning if you follow the proper laser cutting guide.
Let’s go over some common methods that can reduce some of these ugly marks that might ruin your laser cutting or engraving and ways to avoid them in future projects.
- Use paper transfer tape
This is the most common and proven home remedy for scorching issues when using laser cutting. For this remedy, you need household masking tape which can be found at a craft store or office store.
This method includes you covering your whole project surface with masking tape before you start the actual cutting, and once the design is cut, you will want to eliminate all of the tapes. This work avoids the edges of the engraving from becoming stained, while any noteworthy cutting marks will be left on the tape rather than the skin of your cutting materials.
You can use any kind of masking tape for this remedy, but you might have to find one with either a low or high stick, based on the material that you are using. A more costly, but less laborious choice is transfer tape used for vinyl cutting. Great for avoiding burn marks and for other finishing options such as staining or painting.
- Apply coating the wood, then polish it
A second effective method is to add a coating to your wood before in the laser cutter. When the coating is finished, all you want to do is clean off the remaining burned excess, leaving the wood fresh and clean.
This also ends any burnt matter from getting into the wood looking unattractive. You can eliminate burn marks using wooden furniture polish or denatured alcohol and they’ll come off easily because of the smooth coating. Using coating that’s a different color from the wood can also outcome in the engraved area having more difference.
Using this procedure can make your wood look even lucrative! This process can be more tedious and more costly than simply relating tape, but you could always buy finished wood to make the job quicker.
- Set the focus of the laser to an optimal distance
To modify the focus of your laser cutter or engraver, you will want to change the setting of your tool to manual and then reduce the focus of the laser beam, which is said to keep the range of smoke to a least while still enabling the more fragile cuts and engravings to be made on your project.
In the easy words, you need to do is make little changes to the speed and power settings. An optimal distance of laser focus will keep the burn marks at bay while still enabling fine results. There are different settings you can play with to avoid scorching.
Once you’d found the setup that works for each kind of wood, you can make a mark of it to advance the process in the future. It’s possible to freehand adjust the focus of the laser so that it focuses out slightly. A slowly more spread laser decreases the amount of smoke produced while still offering enough power to engrave or cut your material.
- Use the air assist to blow away waste and fumes
Another effective prevention is to use air assistance while laser cutting. It isn’t always guaranteed to prevent burning, but it helps. Air assist is normally just compressed air that is run to the point at which the laser beam makes contact with the material, and can help prevent or decrease scorching on many kinds of materials.
Due to small differences in setup and air, sometimes it works for people and sometimes it doesn’t. Although, increasing the use of the air assist is pretty tough for beginners and can end up being expensive.
Not only can the setup be costly, but using specific gasses other than air can be dangerous. However, using air assistance effectively to avoid burning takes a lot of trial and error and practice, but you might as well use it because it will make a positive difference.
- Comparing different woods in advance
Each wood has its optimal working speed and power. Specific kinds of wood get burned easily, this normally has more to do with the glue binder set in the material rather than the real property of the wood. The glue binder produces more smoke and burns stain while laser cutting.
Professionals suggest testing the speed and power in advance to decrease burn marks on woodcraft. The types of woods you choose and the size of the specific wood can make a huge difference to your final result of the project.
Wattage, speed, environment, and power are crucial while laser cutting. That’s why professionals always recommend performing a materials test on an offcut before you start.
- Damping the wood before laser cutting
Damping the wood involves briefly soaking the wood in water before laser engraving commences. This doesn’t curb the laser’s performance; rather, it prevents any chances of burn marks.
Tips: If the above methods don’t work, denatured alcohol is the last resort for stubborn marks. All you need to do is a little amount of clot and then wipe it over the scorched areas.

Some tips to prevent burn marks during laser cutting
The methods we’ve already mentioned are possibly the most common. But here’s a couple of other things you can try if those seem to not be working as well:
- Use more than one method for the best results.
- Undertaking furniture polish before laser, then sprays some on a rag to use for cleaning up. A coat of wax can help with cleanup time.
- Use mineral spirits to clean slightly discolored wood or acrylic.
- Adjust the frequency or PPI of your laser cutter.
- Try black acrylic if you’re looking for a perfect finish.
- Dish soap works well to clean for plastic and mineral spirits for acrylic.
- Rub sand on the wood to remove the burn marks
Conclusion
Now, you’ve understood there are different methods and tips to prevent laser burn. If you use any one of the above or a blend of them, We can guarantee that your result will look amazing!
If you’ve also some ideas to prevent burning during laser cutting then be sure to let us know what it is!
If you are looking for laser cutting in Sydney and want more information about laser engraving machines, and more ideas and tips to remove burn during laser cutting, contact Any Shape Plastics.